
For beginners, one of the more slippery concepts in photography is the f-stop. What the heck is it, why are the numbers so weird, why do they seemingly run backward, what’s it do, and what should you set yours to?
First, what the heck is it? It’s just a number, representing the relative size of the aperture, or opening, in the lens. Why are the numbers written as f/…? It’s written as a fraction, because that’s what it is: a proportion, defined as the focal length of the lens (f) divided by the size of the aperture. And that answers why the numbers seem backward: a small aperture gets a big f-stop number, and a larger aperture gets a smaller f-stop number, because it’s a fraction. Remember that 220/2 is bigger than 220/22. So if 220 is the focal length, then 220/2 (f/2) is bigger than 220/22 (f/22). With the f-number being at the bottom of the fraction, bigger numbers mean smaller apertures, and vice-versa.
Why? Why did anybody set up such a crazy system for aperture? Well, it’s easier to have a generic number that means the same thing, no matter which lens you’re using, or how long the focal length is. Using a proportion (i.e. a fraction) lets f/16 on a 24mm lens mean the same thing as f/16 on a 300mm lens: the proportion of the aperture size is the same. You can learn just a few f-stop numbers and use them for any lens. If you weren’t using proportions, you’d have to learn apertures as actual diameters, which would be different for every lens. It would be a nightmare, especially with zoom lenses where the focal length keeps changing. Proportions stay the same, no matter which lens or how long the focal length.
Why are the numbers so weird? The geek answer is: the square root of two. For the math geeks who are into that sort of thing, that’s explained below.* But for the photographer who really isn’t interested in high-school geometry, you don’t need to worry about the math; you can just proceed with learning the numbers, and how to use them.
It boils down to learning just a few f-stop numbers, and understanding what they can do for you. The basic f-stops you should get to know, listed from larger aperture to smaller, are:
f/1.4, f/2, f/2.8, f/4, f/5.6, f/8, f/11, f/16, f/22, f/32
There are smaller apertures (f/44, f/64) but you’ll rarely see a lens that has them; most consumer-grade lenses end around f/22 or f/32. There are also special lenses with larger apertures like f/1.2 or even wider, but you’ll also rarely see those in general consumer lenses. In most of the basic kit lenses that come with a DSLR camera, the widest aperture will be around f/4.
You don’t even need to memorize the entire list given above, though with frequent use you’ll quickly get to know those numbers, and they’ll become automatic to you. But if you just remember the beginning, f/1.4 and f/2, the rest fall into place by doubling, with each new number being double the number two places back: so double 1.4 is 2.8, double 2 is 4, double 2.8 is 5.6, 4—>8, 5.6—>11 (rounded), 8—>16, and so on. Here’s an illustration:
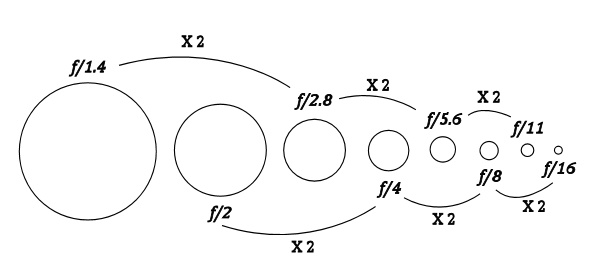
Note that as the f-stop numbers get larger, left to right, the aperture gets smaller, and that every two f-stops the number is doubled.
That’s the numbering scheme. To understand what each f-stop change means, you need to know that every time you move from a lower f-stop number to the next higher number (smaller aperture), you have cut the amount of light coming through in half. So f/8 allows half as much light through the lens as f/5.6; f/2.8 lets twice as much light in as f/4, etc. Each time you close the aperture down by one stop (called “stopping down”), the amount of light gets cut in half; each time you open up by one stop, the amount of light doubles. This is the first crucial concept to hold on to about f-stops.
Once you get used to this, and start getting familiar with the basic numbers, you’ll be able to go from f/16 to f/5.6 and simply know that you’ve opened up the lens by 3 stops, or that if you switch from f/2.8 to f/5.6, you’ve stopped down by two stops. Look again at the progression of f-stop numbers above. Going from left to right, each number means closing down one stop—half as much light—as the previous number. Going the opposite direction means opening up one stop—twice as much light—for each number.
You will see other numbers, in between those listed above, on your camera’s aperture scale. Those are the in-between stops, usually in steps of either 1/2 or 1/3 stop. (On most modern DSLRs the size of the partial stops is selectable in the camera’s configuration menu. You can choose to see either half stops or one-third stops.) You don’t need to memorize all those additional numbers. If you get used to the whole-stop numbers listed above, it will be easy for you to see that f/3.6 is stopped down between f/2.8 and f/4, or f/9 is a bit more stopped down than f/8. Get used to the whole-stop numbers from f/1.4 to f/32, and the partial stops will take care of themselves.
OK, so that’s how the numbers work, and what they mean, in general. So what?
The “so what” has two answers. The first you already know: stopping down the lens from one f-stop to the next lets in less light—one half as much, to be precise. That’s important because if you’re indoors, with low light, and you can’t or don’t want to use a flash, opening up the aperture is a good way to let in more light. There are other factors, which I’ll go into in a post about Exposure, but generally speaking, shooting indoors, or at dusk, or whenever light is not very bright, you can use a bigger aperture—a lower f-stop number—to let in more light.
The second aspect of aperture size is ofentimes even more important than the decision about how much light to let in. The other thing the f-stop number affects is the depth-of-field in your exposure. Depth-of-field describes how deep into the picture things will be in focus. For example, if you’re shooting a vase of flowers, four feet from your camera’s sensor, do you want only the closest flowers to be in focus, while the farther ones are blurred? Say the flowers extend between four feet away at the nearest, to five feet at the farthest from your camera. If you want all of them in focus, you’ll need a depth-of-field of at least a foot. If you just want the nearest flower to be in focus, while the others blur into the background, you might only need a DOF of a couple inches. The aperture you choose, defined by the f-stop number, plays a major role in determining the depth-of-field of your photo. (There are other factors that contribute to depth-of-field, enough so that I’ll dedicate an entire post to that subject soon.)
That’s the other aspect of those f-stop numbers listed above that you need to get familiar with. From left to right (larger to smaller apertures), the DOF will increase as you stop down the lens. Going the other direction, the DOF will decrease as you open up the lens. There is no direct correlation that lets you say exactly how many inches or feet the depth-of-field will be for any given f-stop, because DOF also depends on other factors, including the focal length of the lens and the distance to the subject you’re focusing on. We’ll go more into how DOF works, and how you can calculate, or at least estimate, just how deep the DOF will be for a given situation, in another post. But get used to the general concept that bigger f-stop numbers (smaller apertures) mean greater depth-of-field, and vice-versa.
These examples show the difference in depth-of-field. The first is at f/8, the second f/11, and the third f/22. Notice how much more of the top of this fence comes into focus as the aperture gets smaller (and the f-stop number gets larger).

Fence Top At f/8

Fence Top At f/11
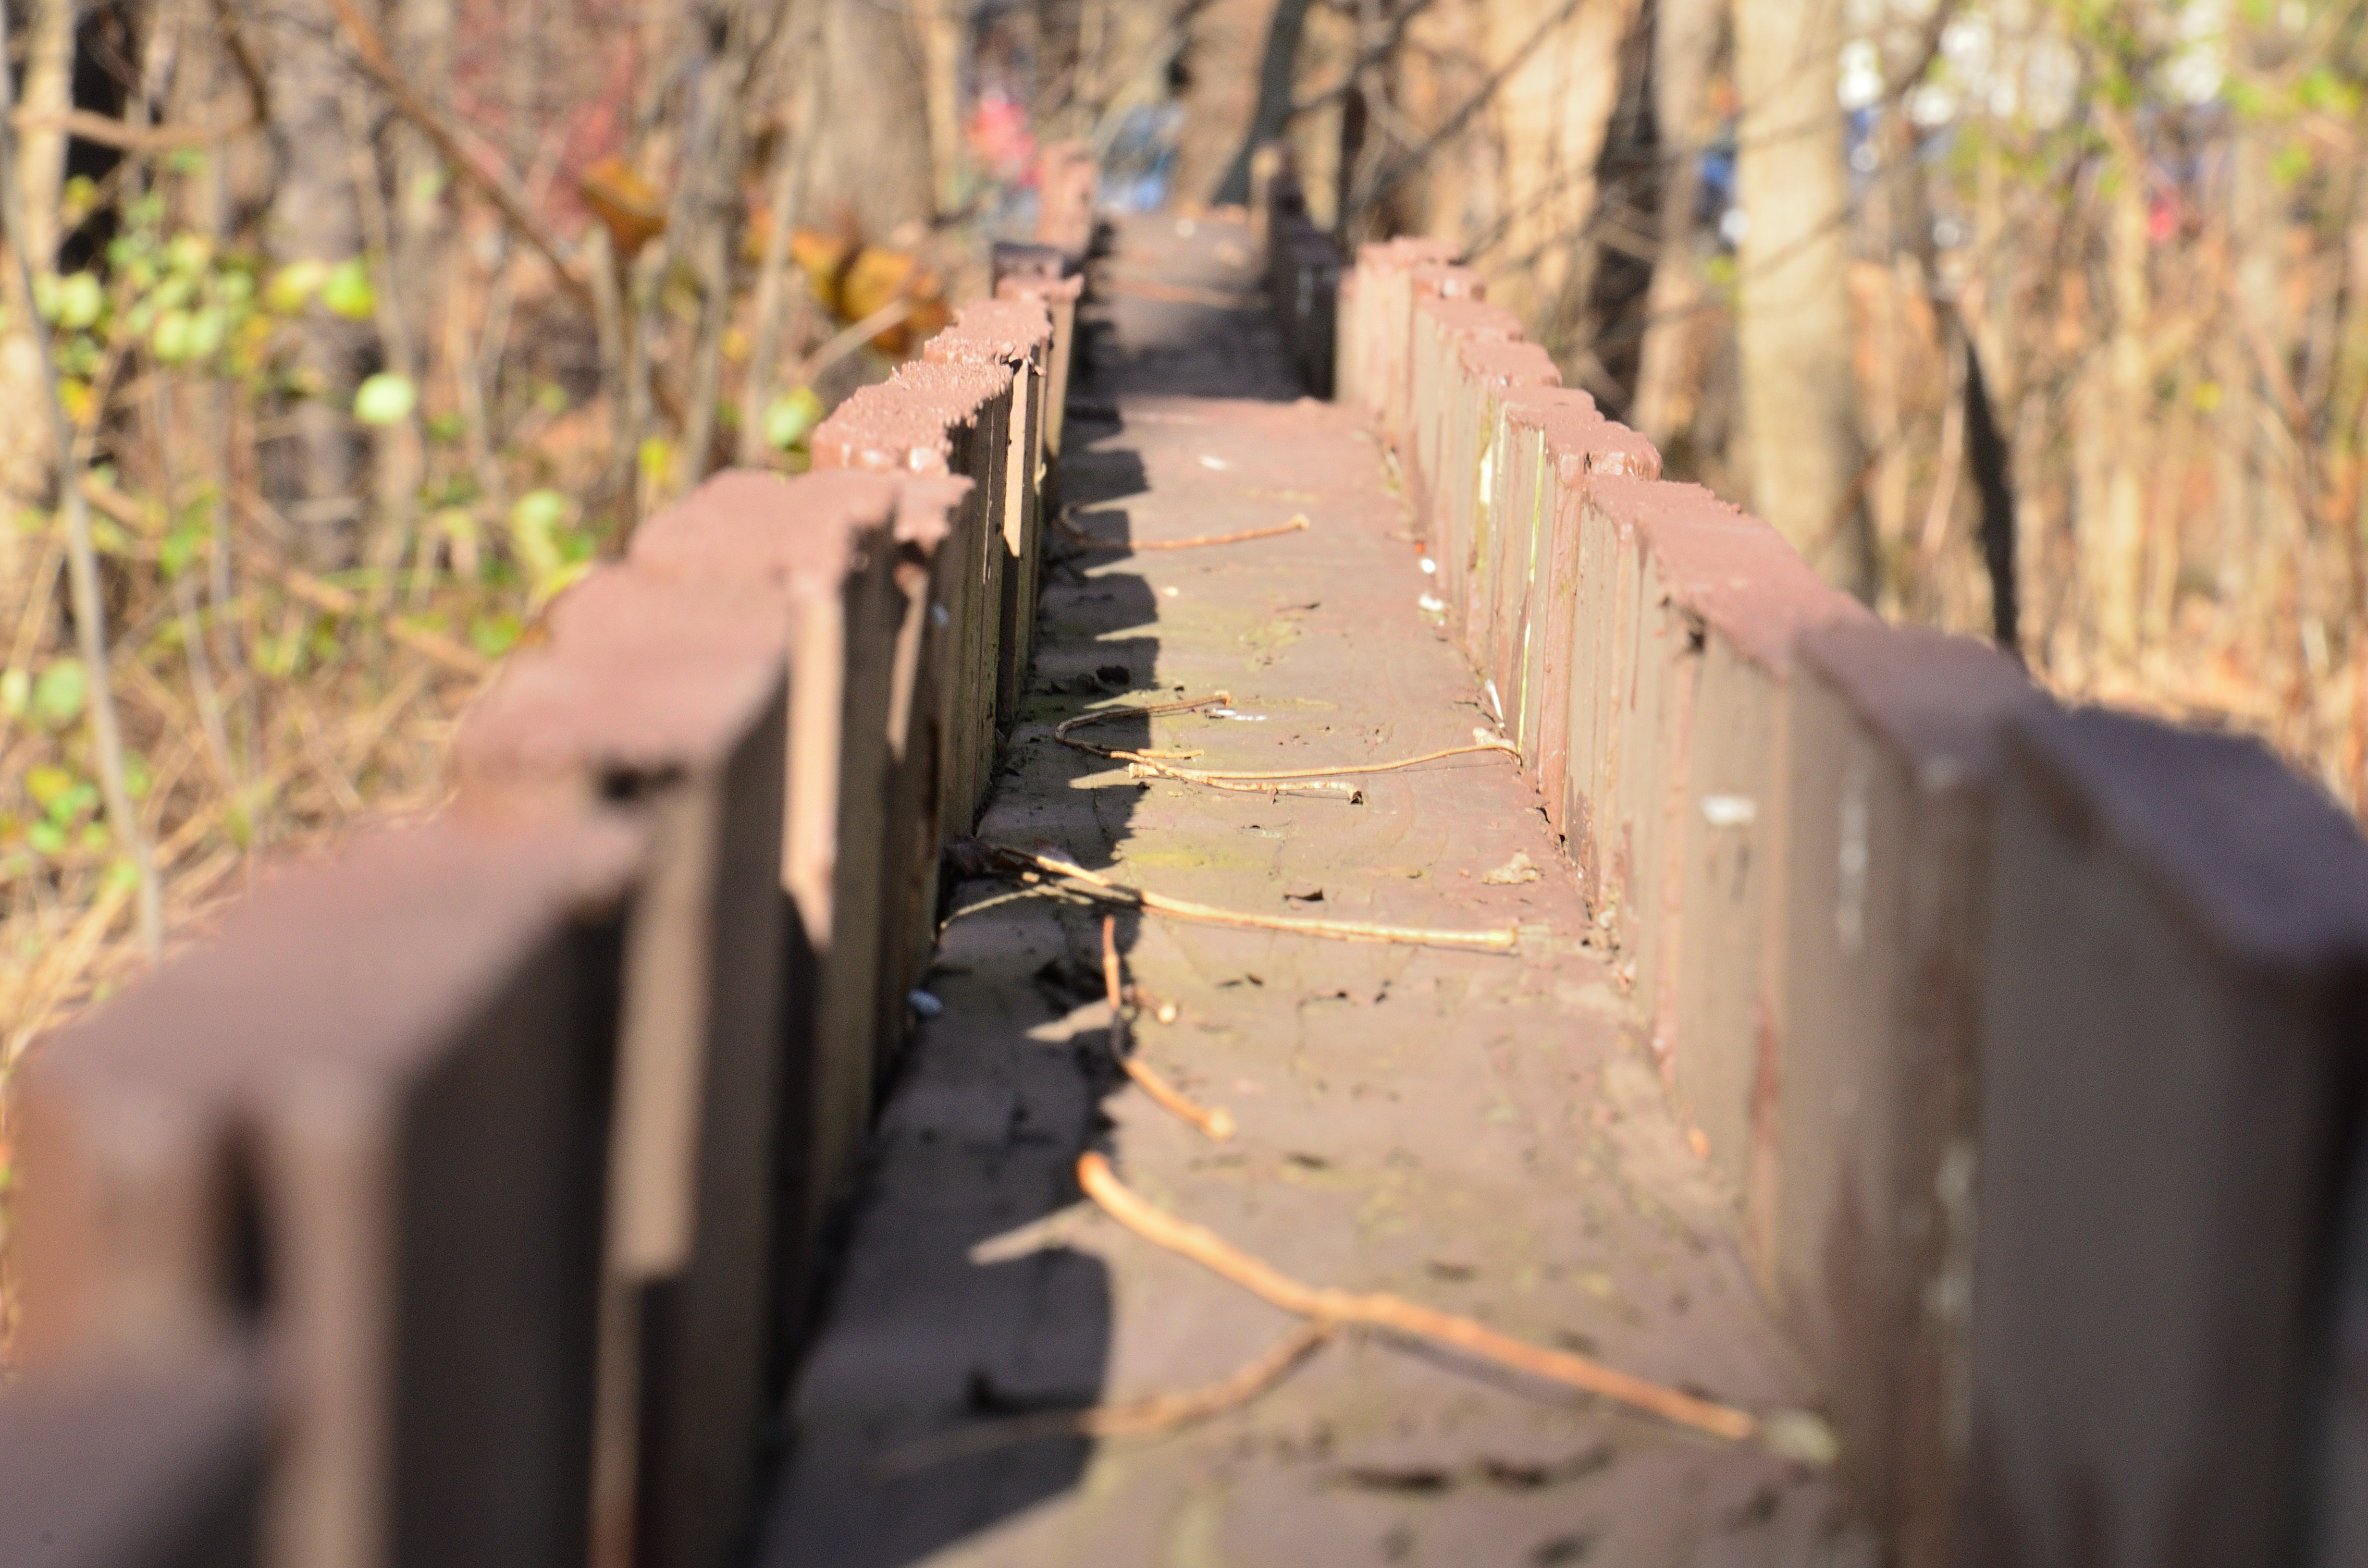
Fence Top At f/22
But why wouldn’t you want as much as possible to be in focus? Think about some of the really cool photos you’ve seen, of flowers, or portraits of people, or any other specific subject, rather than a big open landscape shot. Ever notice how the subject is nicely focused, while the whole background behind them is a blur? That’s done on purpose, because it has the effect of concentrating the viewer’s attention on just what the photographer wanted to emphasize, without a lot of messy distraction in the background. And a crucial means of creating that nice blur in the background is selecting the right aperture. (That nice background blur is called “bokeh”, and lens designers work hard at making sure their lens has an attractive bokeh.)
Here you can see the difference in depth of field between a fairly wide aperture (f/5.6) and a very narrow one (f/22).
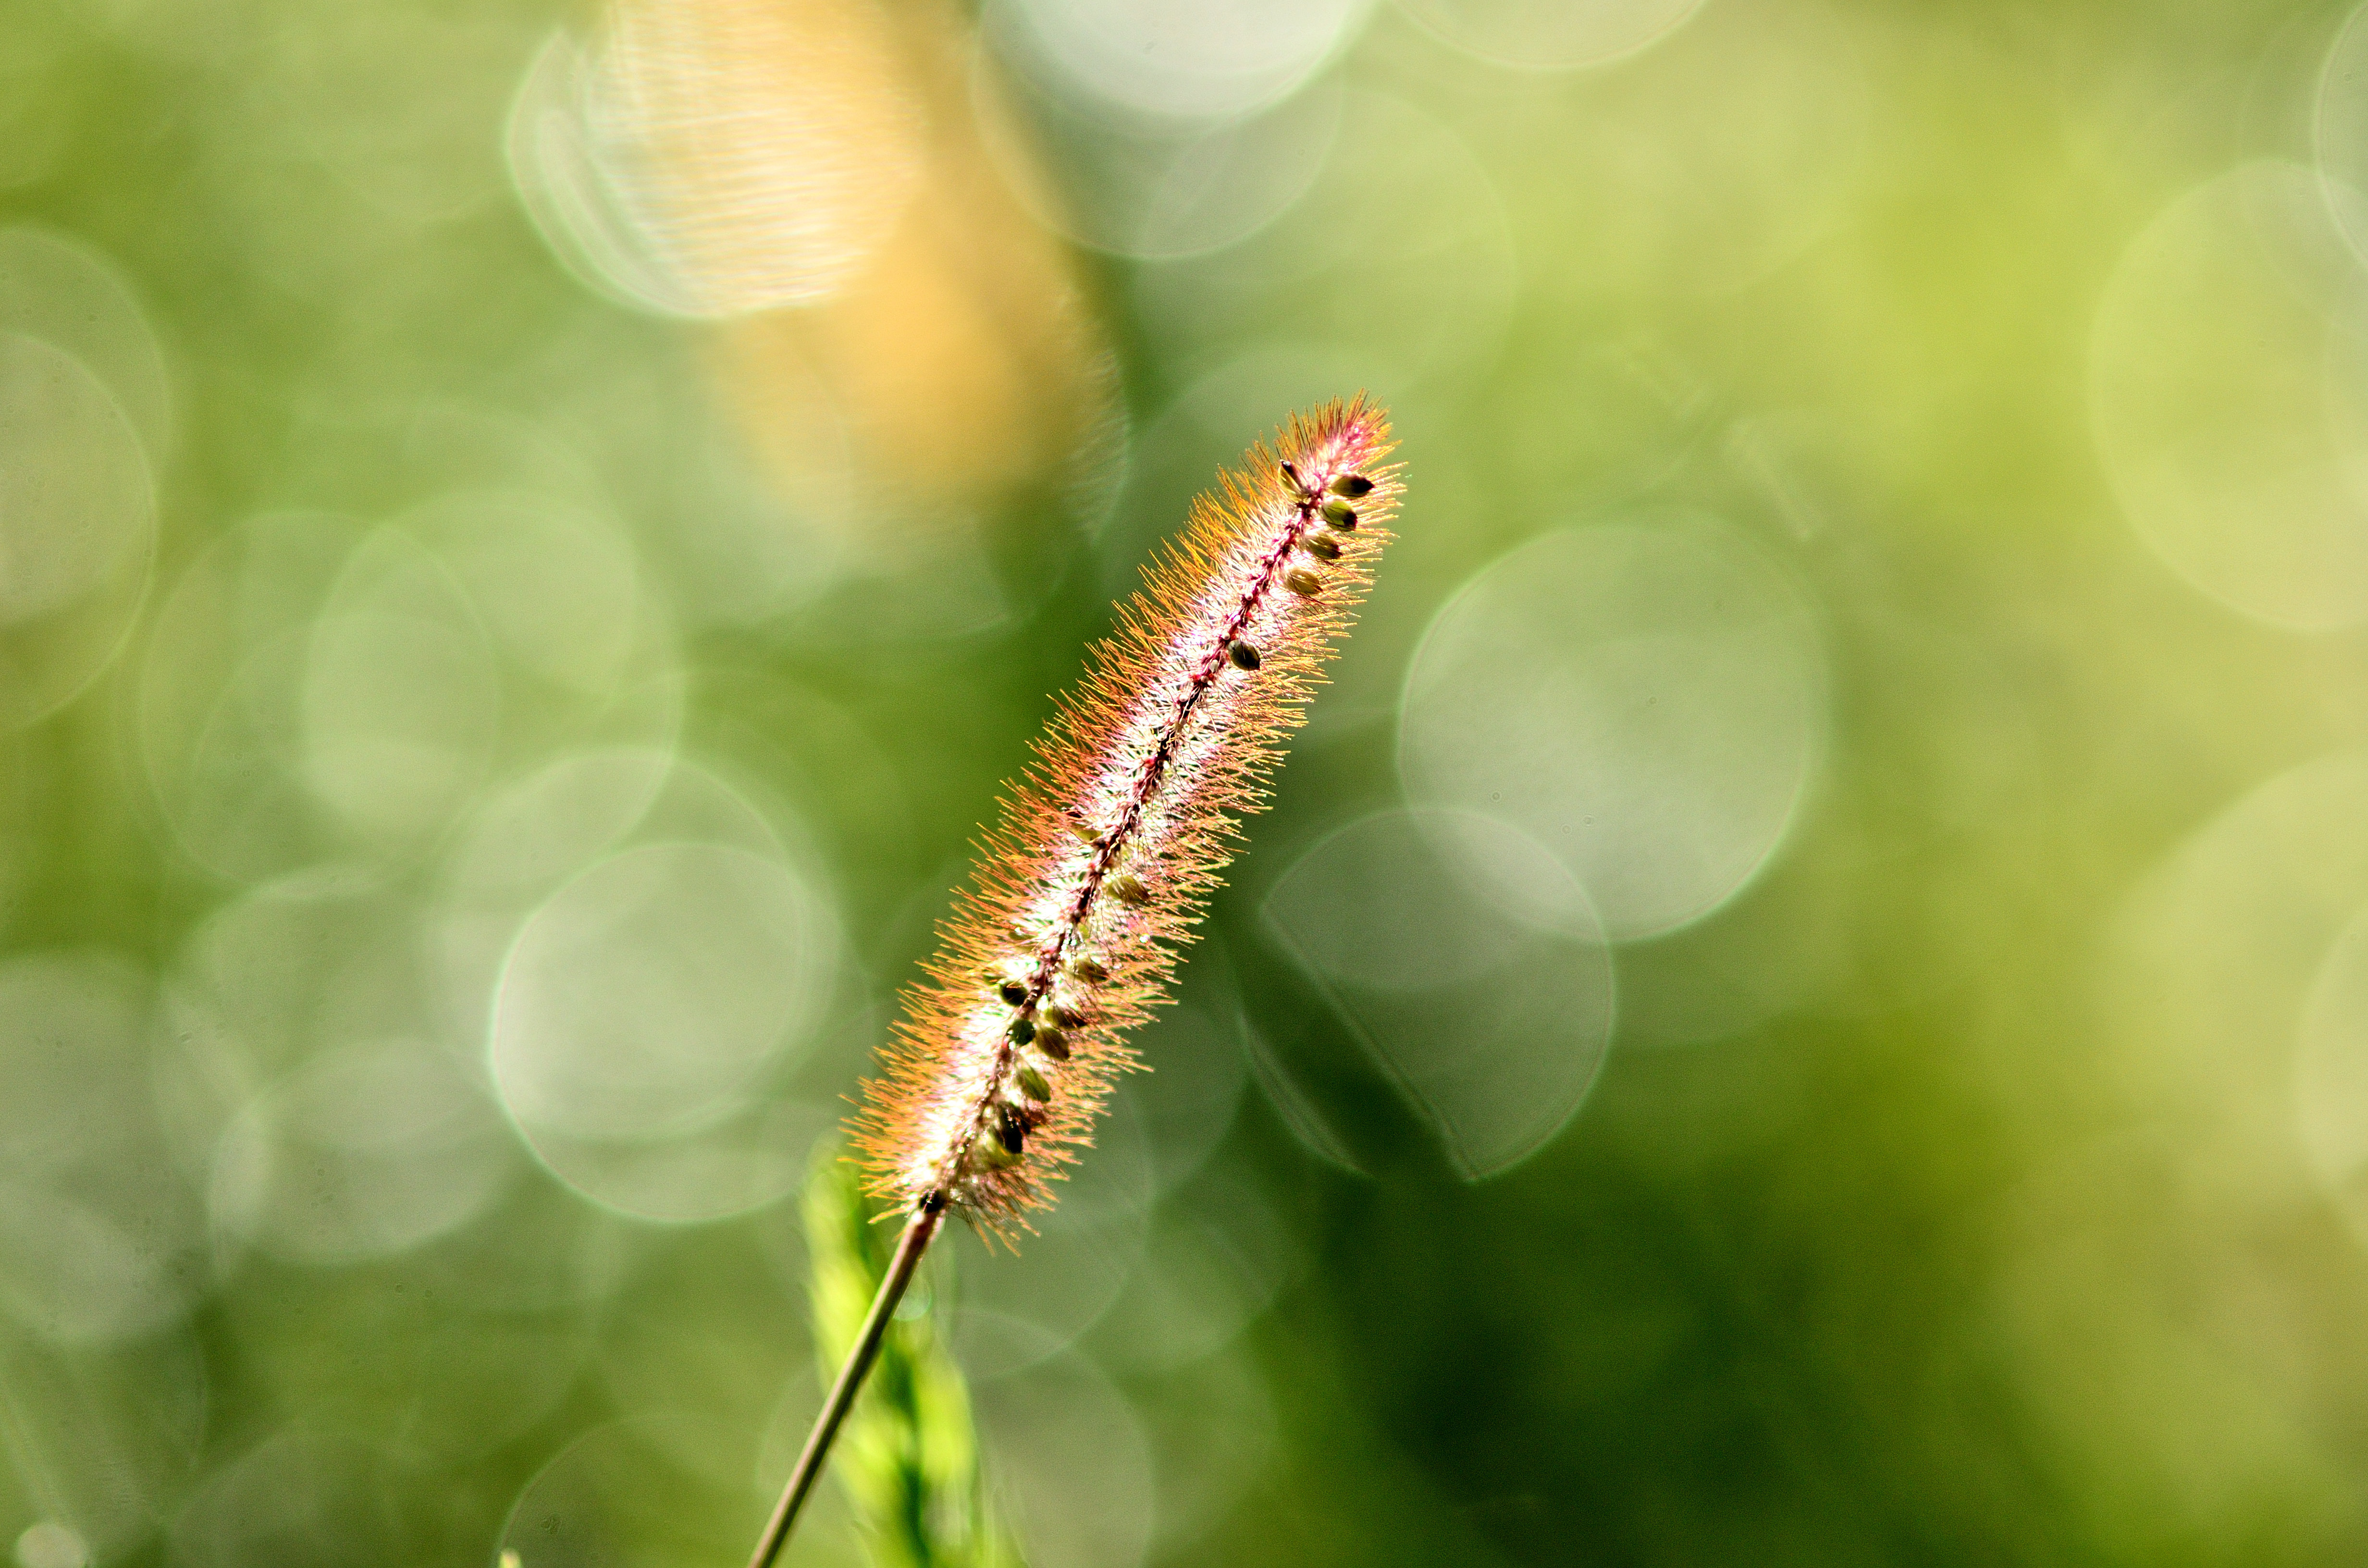
A wider aperture (f/5.6) creates a more shallow depth of field, blurring the background and emphasizing the subject in the foreground.

Stopping down to a narrow aperture (f/22) helps to create a very large depth of field, with everything in focus from the foreground grasses to the distant trees.
How and why to choose specific apertures for specific shots is something we’ll get into in a post about Exposure (and discuss again in a post about Composition). But this summary is plenty for one post, and should give you the foundation to understand aperture in terms of f-stop.
In summary:
- F-stop is a number that describes the relative size of the aperture, the opening light comes through in a lens.
- Each stop down to a bigger number (smaller aperture) is half as much light; each stop up is twice as much light.
- Bigger f-stop numbers also mean greater depth-of-field, making more of the photo in focus.
- You should get to know the full-stop numbers: f/1.4, f/2, f/2.8, f/4, f/5.6, f/8, f/11, f/16, f/22, f/32
——————————————————————————
*For the math geeks (like me):
Since each f-stop means either halving or doubling the amount of light let in, it’s halving or doubling the area of the opening in the lens (the aperture). The opening is circular, which means the area of the aperture is the number pi times the square of the radius, or (since apertures are measured as diameters) pi times the square of the diameter, divided by four. That means to get double the area, you need to multiply the diameter by the square root of two. To get an aperture half the area (i.e. one stop smaller) you would divide the aperture (diameter) by the square root of two. Since the f-stop number is in the denominator, below the focal length—remember it’s f/aperture—dividing by square root of two is in effect multiplying the denominator by square root of two.
The square root of two is (about) 1.4, and when you stop down the aperture so that it lets in half as much light, you have multiplied the f-number by the square root of two. If you started with an aperture of f/1.4, closing down one stop takes you to f/2. The next stop is f/2.8 (2 x 1.4), then f/4 (2.8 x 1.4), then f/5.6, then f/8, and so on. As described above, every two numbers is a doubling (square root of two X square root of two). Another way to look at it is that the f-stop numbers are a logarithmic progression, not unlike a scale on a slide rule. And there ends the geek digression.